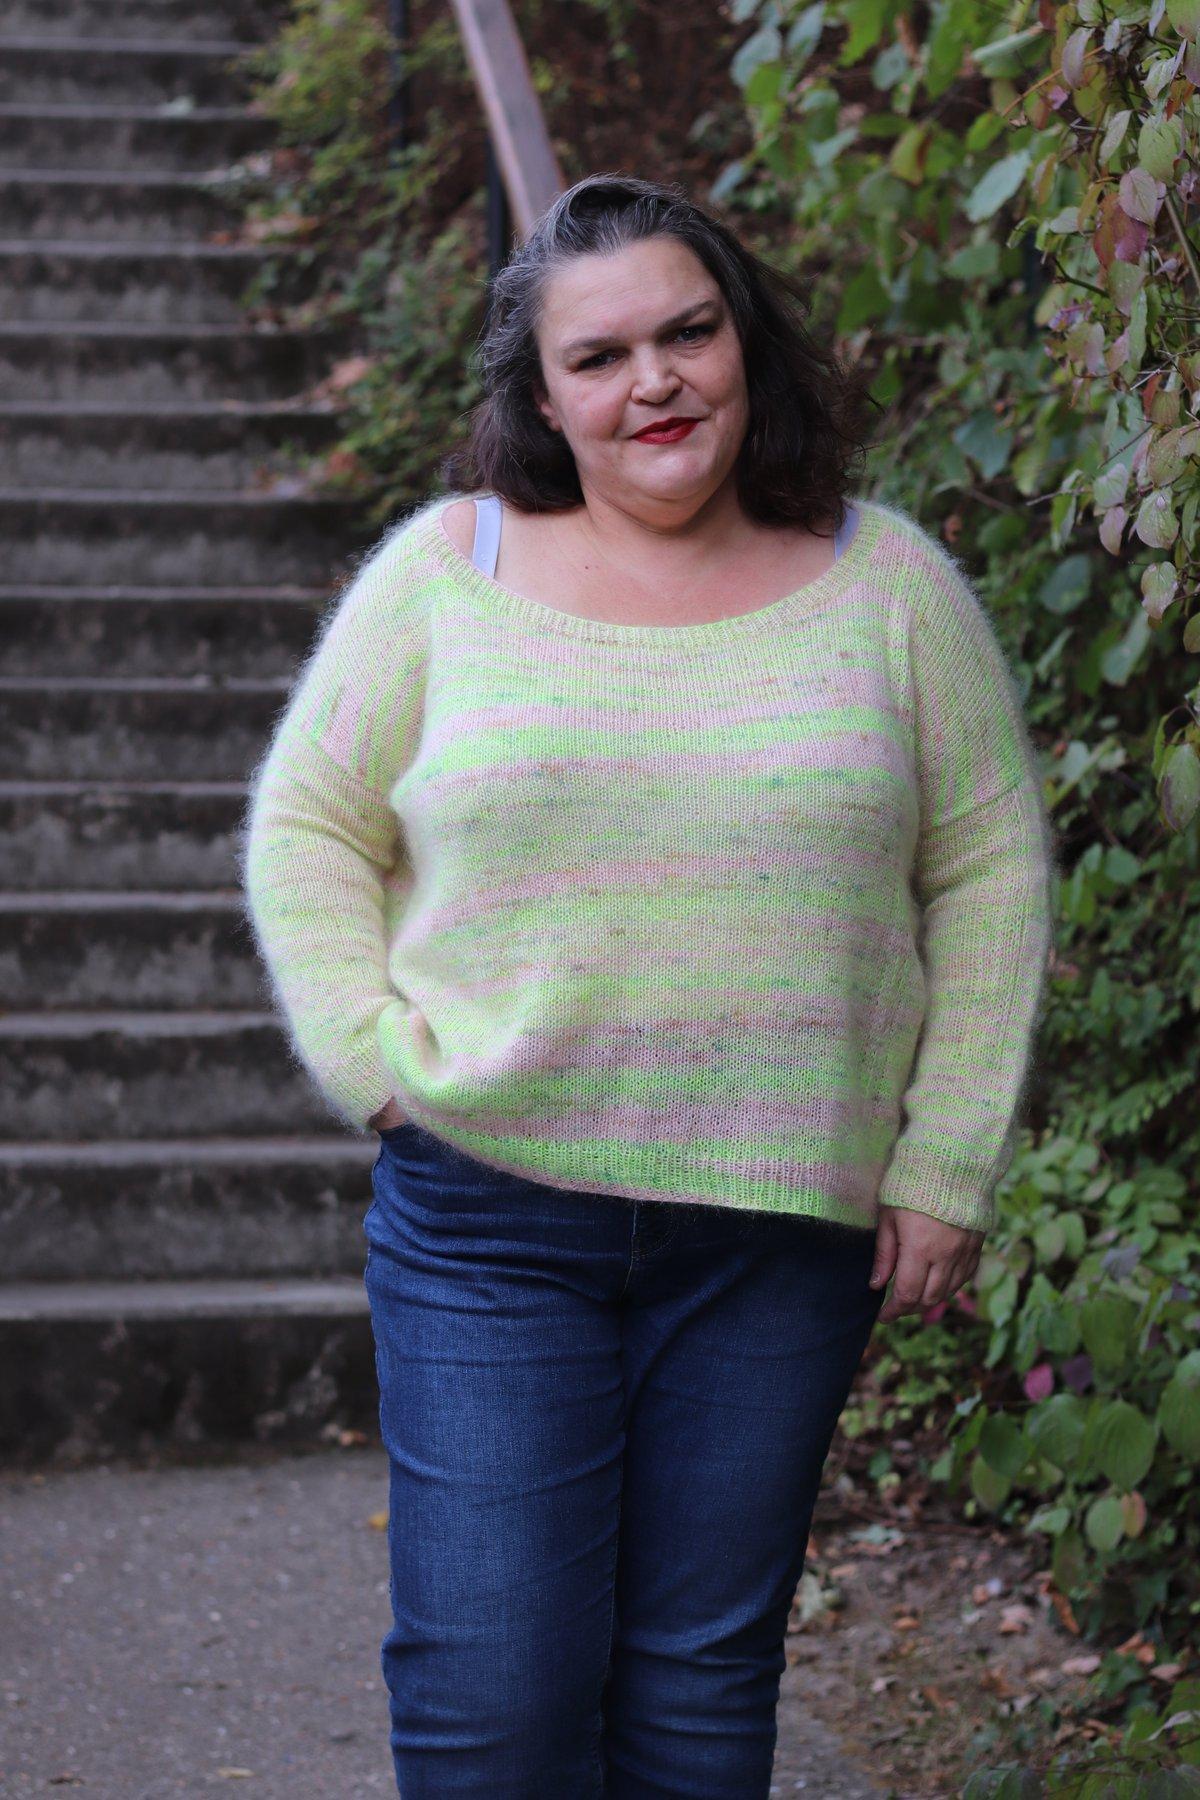
Collioure, my next Mariannière
Before the photos and the release, I’m opening the doors of the studio: Collioure, my new Mariannière, born of my first collaboration with Les Petites Potions. Its construction step by step, the choices behind each stage, and the two sleeves and two finishes you’ll be able to choose from.
· 10 min read
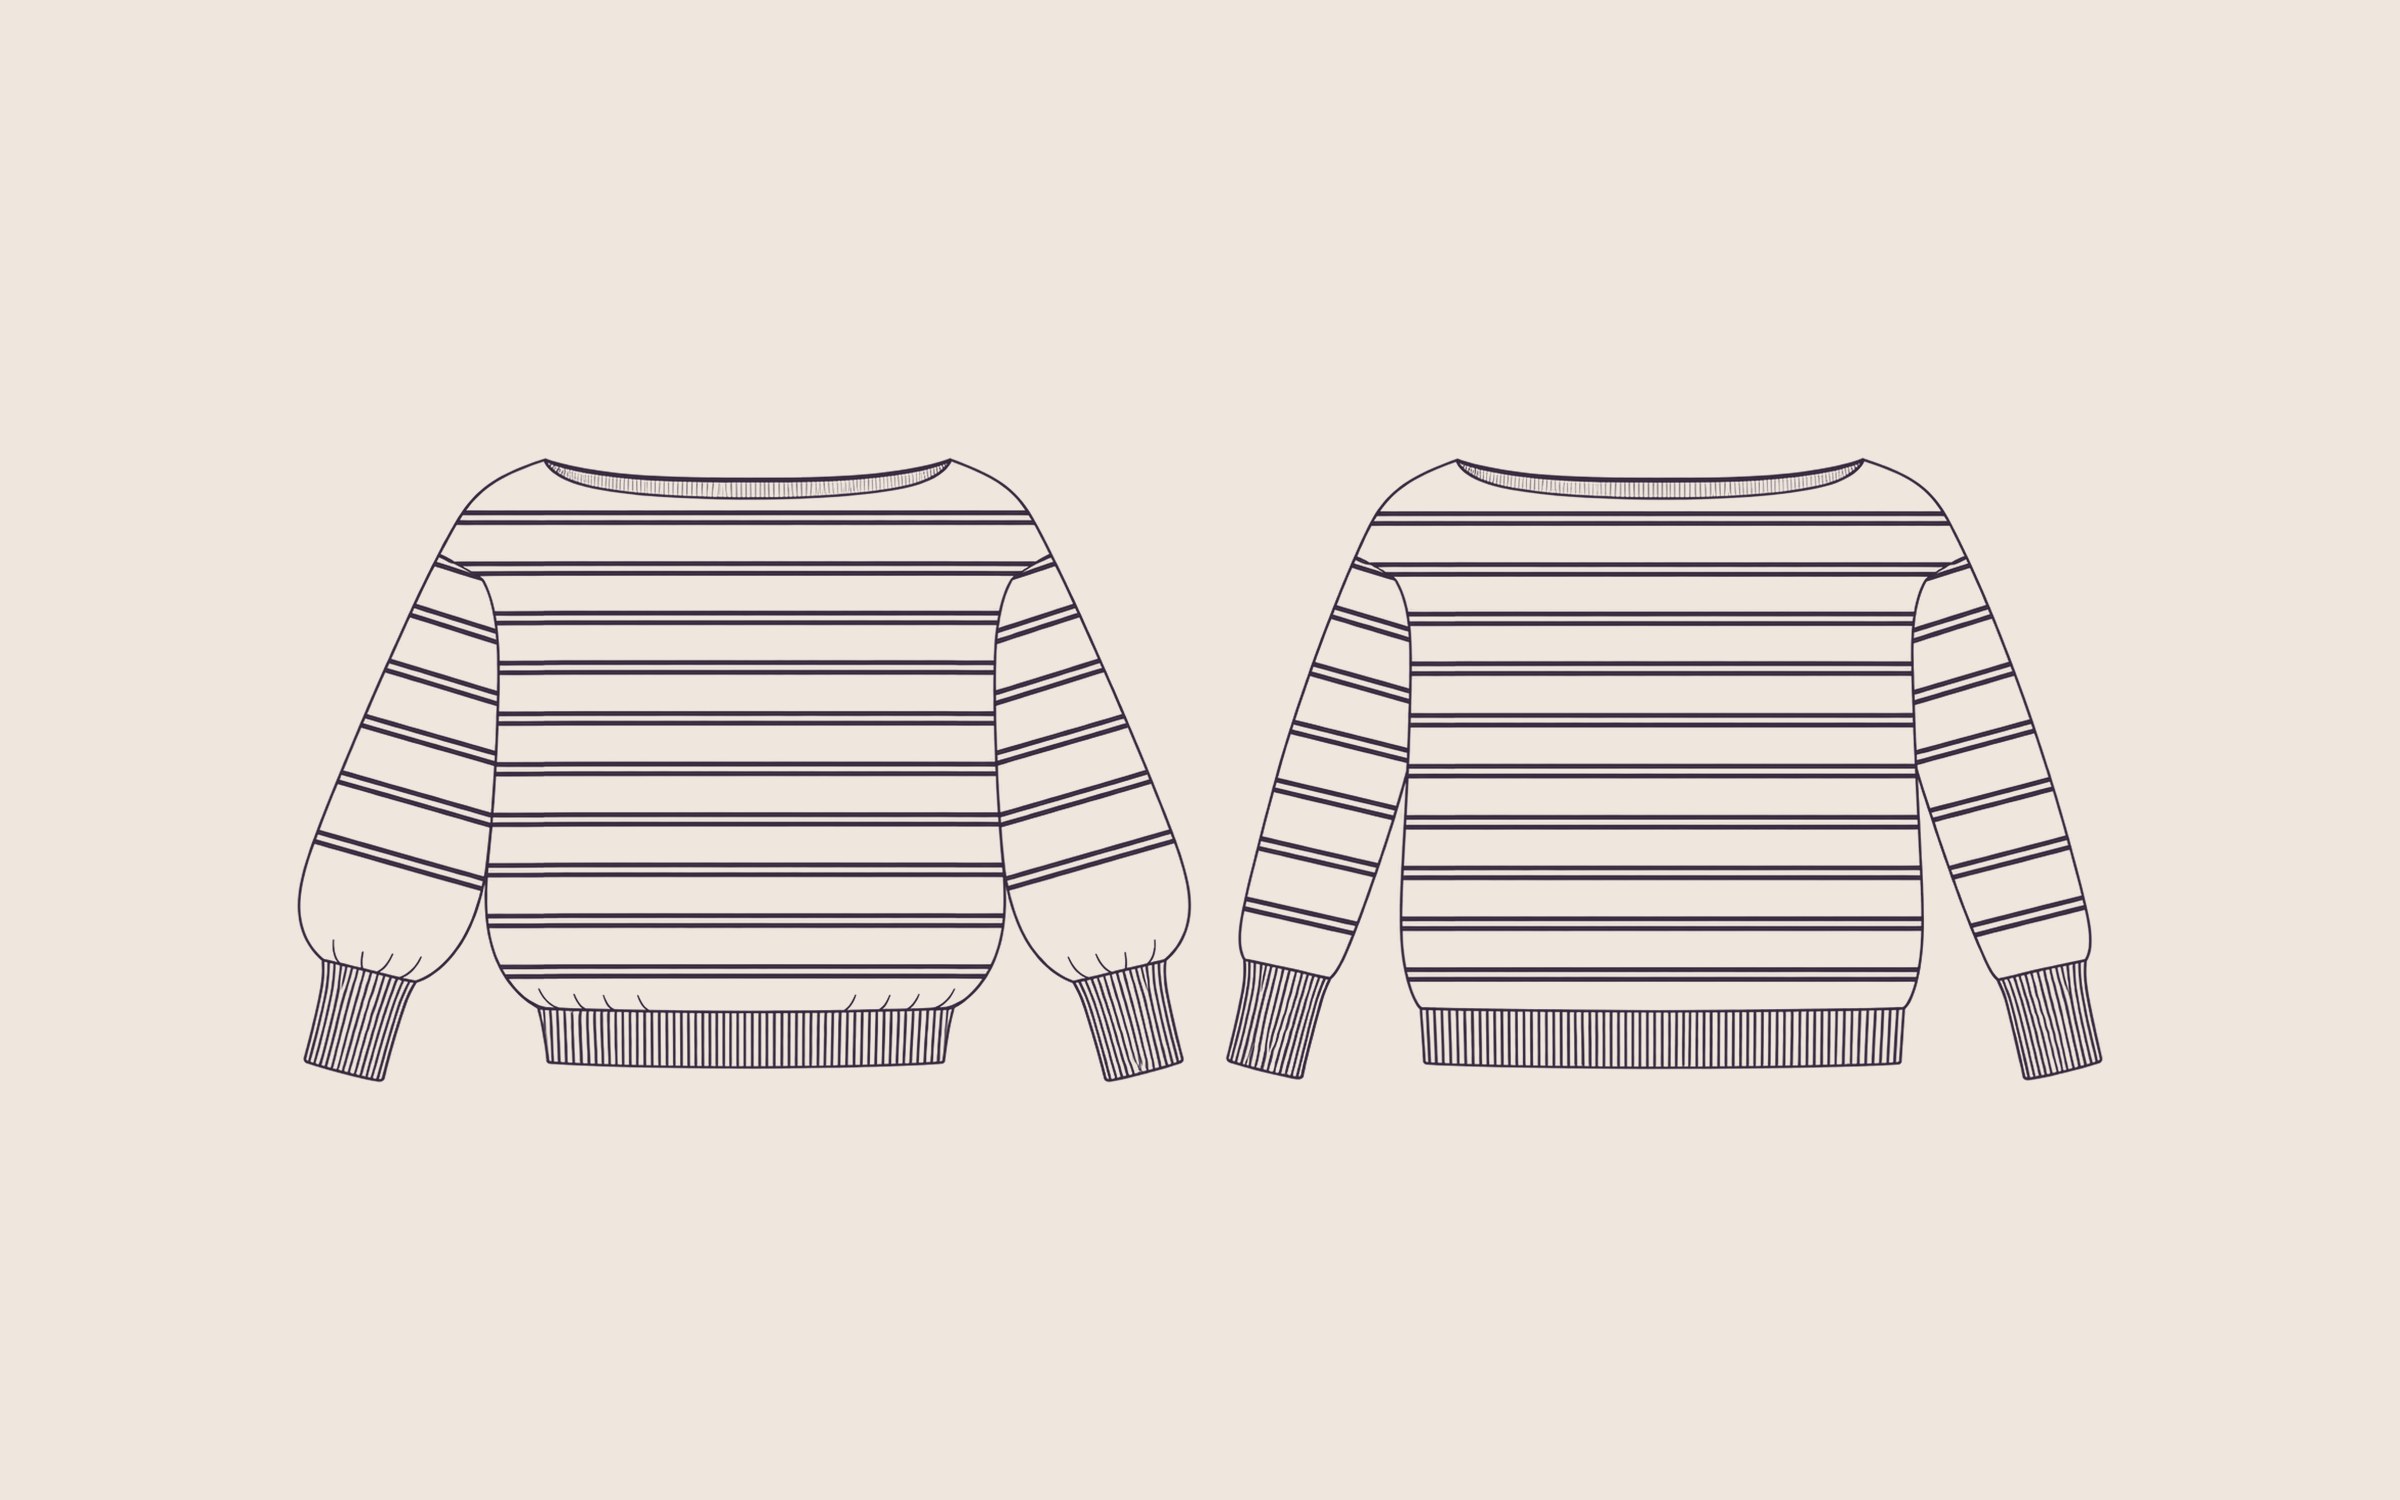
Usually, I introduce a pattern on the day it’s released, with its photos and its finished instructions. Everything that happened before stays in the studio.
This time, I wanted to do things differently. Collioure is currently in the hands of my testers, and before it reaches your needles, I wanted to tell you how it came together: where its name comes from, why it starts with the shoulders, what changed during testing and the choices you’ll make while knitting it.
A sneak peek, of sorts. With schematics rather than photos… or almost.
A new Mariannière
Collioure joins my Mariannière collection, the series of designs in which I reinterpret the timeless marinière in my own way. Louët, Ar Men, Espiguette, Gatteville and Mean Ruz are already part of it, each with its own shape, its own rhythm of stripes and its own construction detail.
For this one, I wanted a soft, luminous marinière. Wide stripes, a comfortable silhouette, a wide neckline that frees the neck, and gently puffed sleeves. A great classic, but in a resolutely contemporary version.
A name chosen together
Collioure is my first collaboration with Les Petites Potions. And for the first time, the name of one of my Mariannières wasn’t chosen by me alone: Deborah, from Les Petites Potions, and I settled on Collioure together.
I love the idea that this design carries the mark of our collaboration right down to its name. It was born of an exchange, around a yarn and a shared wish, and its name keeps the memory of it.
Obsidienne, and a fine stockinette
The yarn is Obsidienne from Les Petites Potions: a blend of yak and silk with an exceptional softness. Its fluidity, natural drape and subtle sheen bring out the rhythm of the stripes beautifully.
It’s the yarn that guided the gauge. I wanted a fine, supple stockinette that lets the fibre fall rather than holding it: 26 stitches and 36 rows to 10 cm, on 3.25 mm needles. With a yarn like this one, too tight a fabric would have stiffened it, and it’s precisely its fluidity that gives the balloon sleeves and the gathered hem their movement.
The pattern calls for two colours: from 910 to 2080 m of the main colour, that is 3 to 6 skeins depending on the size, and from 260 to 590 m of the contrast colour, that is 1 or 2 skeins. I calculated these amounts with the balloon sleeves in mind, the hungrier of the two: whichever version you choose, you won’t run short.
The rhythm of the stripes
Collioure’s stripes follow a four-step rhythm: 10 rows in the main colour, 2 rows in the contrast colour, 4 rows in the main colour, then 2 contrast rows again.
So these are double stripes, two thin lines close together that come back every 18 rows, roughly every 5 cm at gauge. From a distance, you read a marinière. Up close, you discover this little play of rhythm that I love, lighter than a single wide band.
They run across the whole garment, from the top of the shoulders down to the ribbing, then carry on along the sleeves. And the construction is what it is partly because of them.
It all begins with the shoulders
Collioure is knitted from the top down, with no seams at all. But rather than starting at the neckline, like many top-down sweaters, it starts with the shoulders.
Each one is worked flat, separately, from just 8 stitches. Two markers set apart the four centre stitches: they draw a thin line along the top of the shoulder, and the increases are worked on either side of it, on the front and on the back.
After a few rows, stitches are cast on at the beginning of rows, 3, then 4, then 5. These are what draw the curve of the neckline, front and back. Cast on in steps like this, the neckline takes on a wide, shallow shape that stays neat without any short rows.
Once both shoulders are done, they are joined in the round by casting on the stitches at the centre front and centre back. From there on, everything is worked in the round.
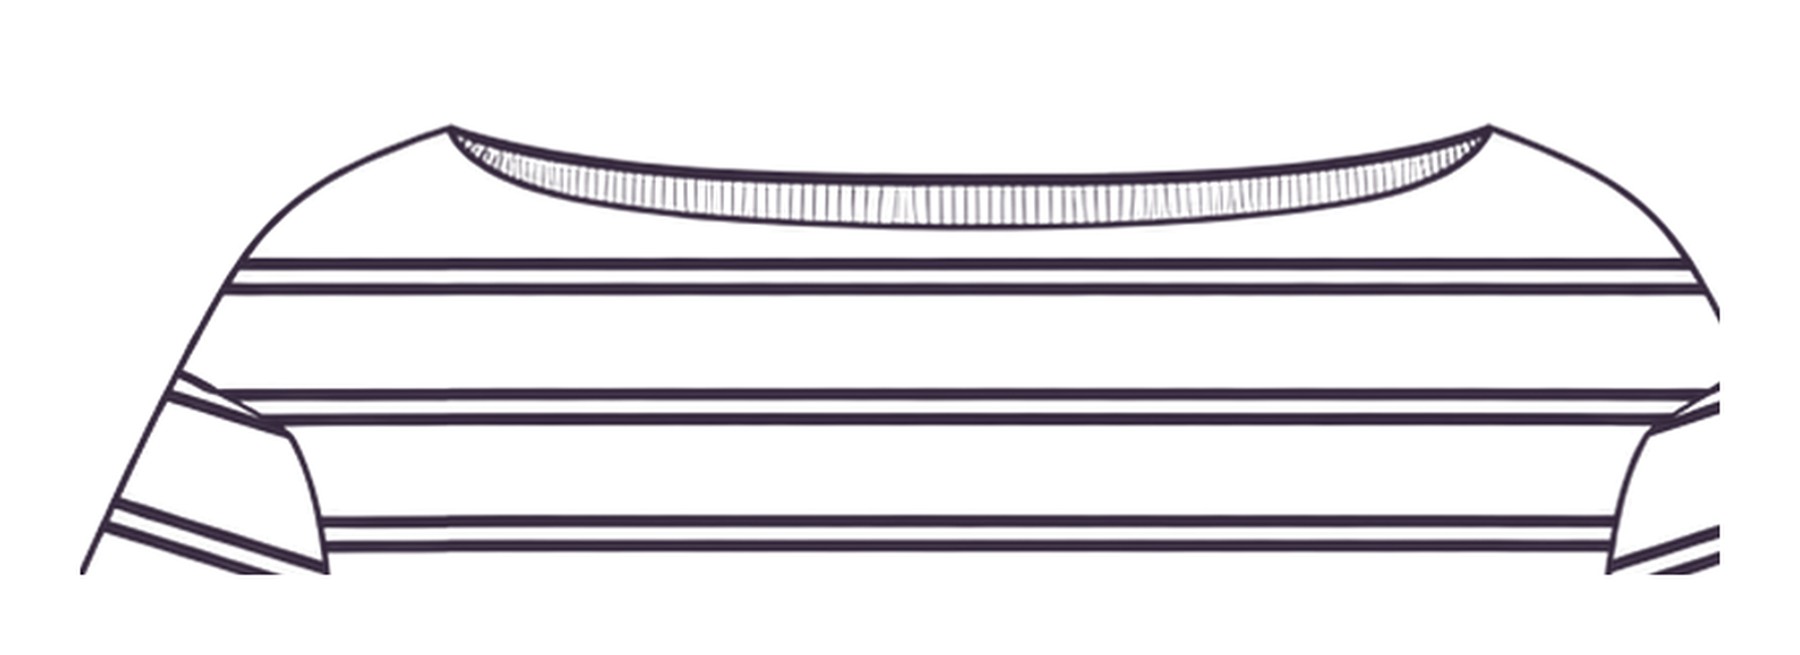
Shoulders that slip onto the arm
After the join, the increases carry on every round, always on either side of the four shoulder stitches. Only the front and the back widen: those four stitches stay put. They are waiting for the sleeve.
This is the choice that gives Collioure its silhouette. The top of the garment widens without forming diagonal raglan lines, and the stripes stay perfectly horizontal across the front and back, right up to the top of the shoulder. The shoulder itself extends slightly onto the arm, as you can see in the schematic.
That extension has a consequence you might not notice at first glance: the larger the size, the wider the front, and the lower the shoulder falls on the arm. So that the wrist lands in the right place in every size, the sleeves get shorter as the sizes increase. The balloon sleeve measures 43 cm up to size 7, then gradually shortens to 37.5 cm in size 16.
Separating the front and the back
Once the shoulders have reached their width, it’s time to separate. You knit one full round, placing each part on hold as you go: the first shoulder, the back, the second shoulder. The front stays on the needle.
One tester asked me why this full round, when you could go straight into working the front back and forth. Her method works too, and gives exactly the same result. But I kept the round: it makes placing the stitches on hold easier, since each part passes onto the needle just as you set it aside, with no counting and no hunting for markers.
The front and the back are then each worked flat. This is the part that creates the depth of the armholes: from 20 to 27 cm depending on the size, measured from the separation. Working them separately makes it possible to set that depth independently of the width of the shoulders.
Then everything is joined again by casting on four stitches under each arm, and the body continues in the round down to the finishing.
Sleeves picked up all around the armhole
The sleeves aren’t knitted separately. The stitches are picked up all around the armhole, starting at the middle of the underarm, taking in the four shoulder stitches left on hold along the way.
The little line that starts at the neckline thus continues to the top of the sleeve, with no seam or join. The sleeves are then worked in the round, carrying on the stripes, and this is where your first choice comes in.
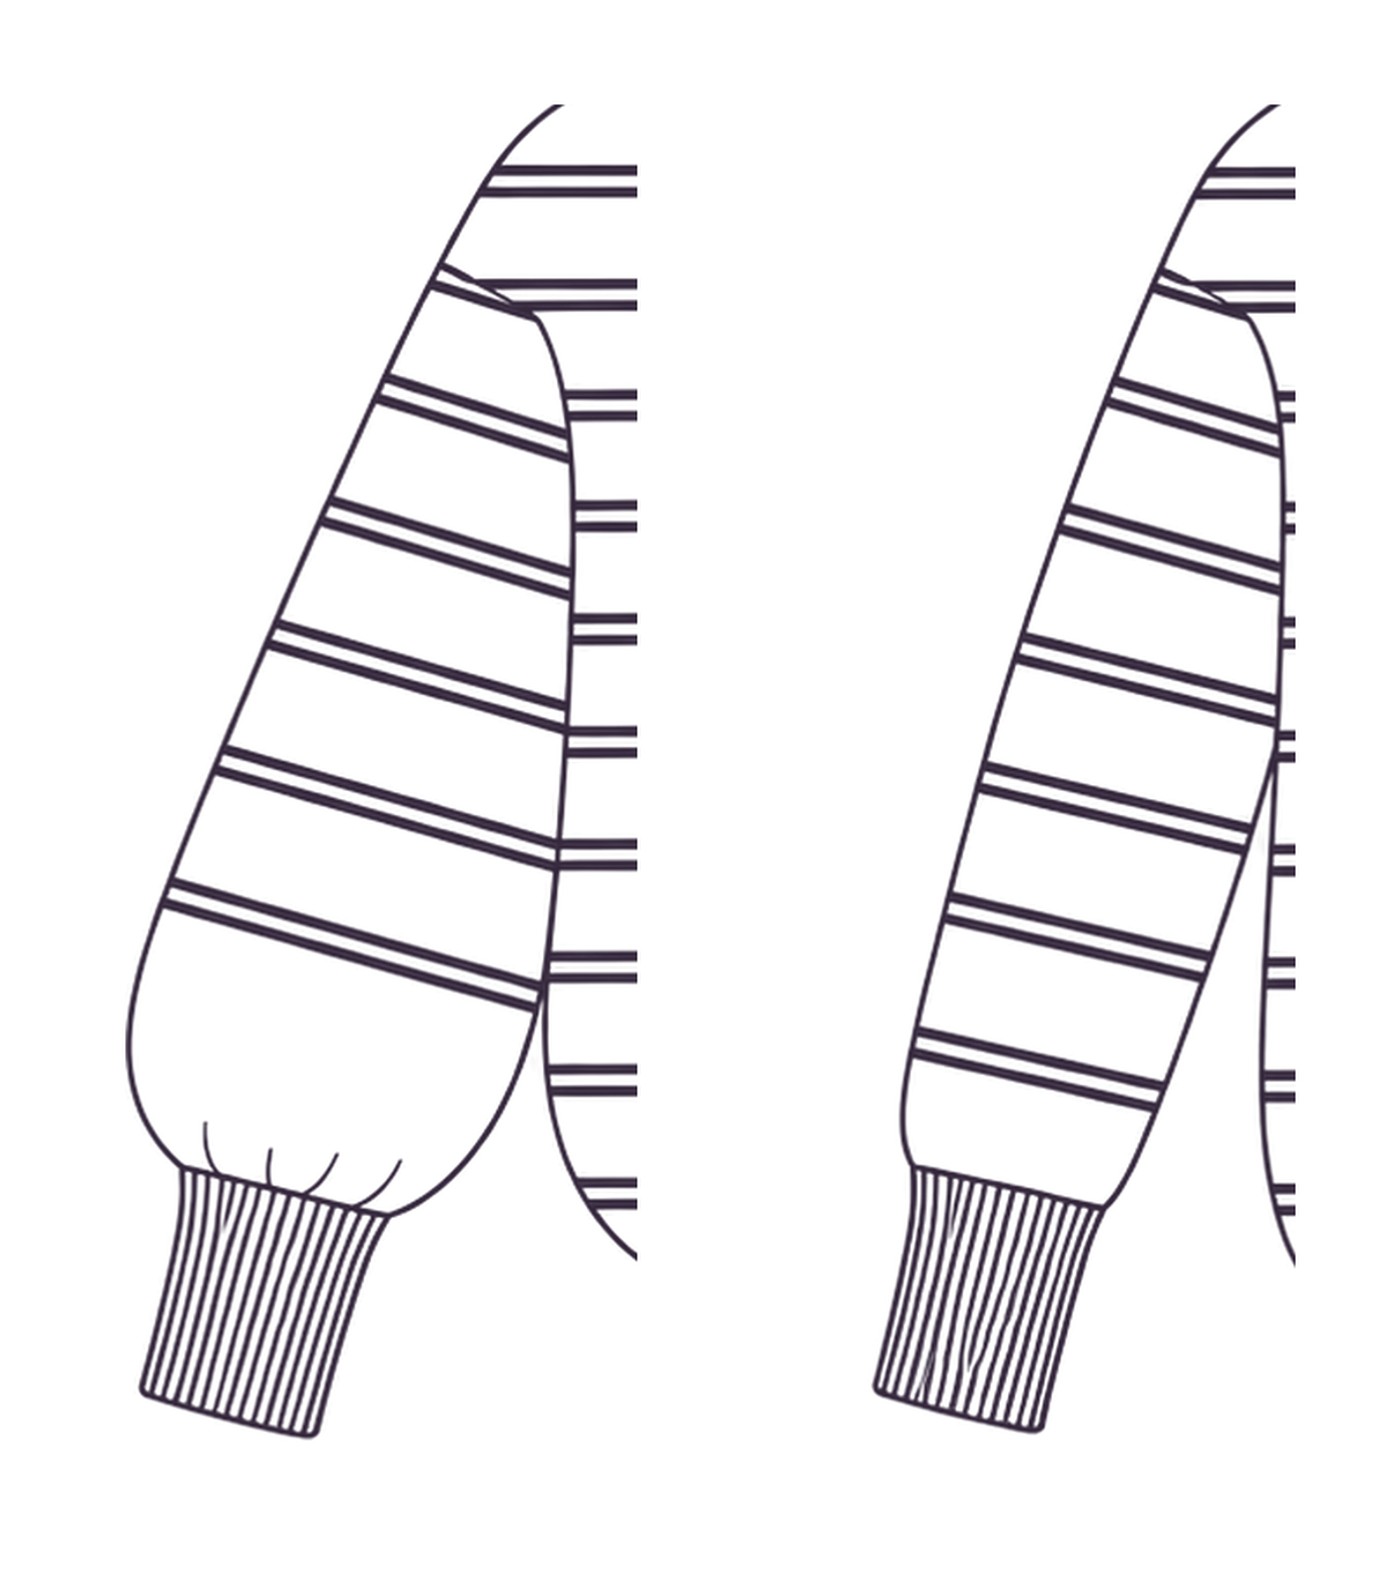
The balloon sleeve keeps all its fullness down to the wrist. There, half the stitches are decreased in a single round, by knitting every stitch together in pairs, before going straight into 10 cm of 1x1 ribbing on the smaller needles. It’s this sudden change that gathers the bottom of the sleeve, and this long cuff that holds the volume and gives it its puffed look.
The fitted sleeve was born of a fitting during the test: the balloon sleeve doesn’t suit everyone, and it felt important to offer an alternative. It tapers steadily along the arm, with one decrease on each side every 3 to 5 rows depending on the size, then finishes with the same 10 cm of ribbing. Closer to the arm and more understated, it leaves all the room to the stripes.
Two finishes for the body
The bottom of the body also finishes in two ways, and that’s your second choice.
At first, the pattern offered only one: a decrease round that removes about 10% of the stitches before the ribbing. But once worn, the hem didn’t draw in enough. It wasn’t true to the drawing I had in mind.
So I added a second, more pronounced finish. Rather than changing the first one, I preferred to keep both, just like the sleeves.
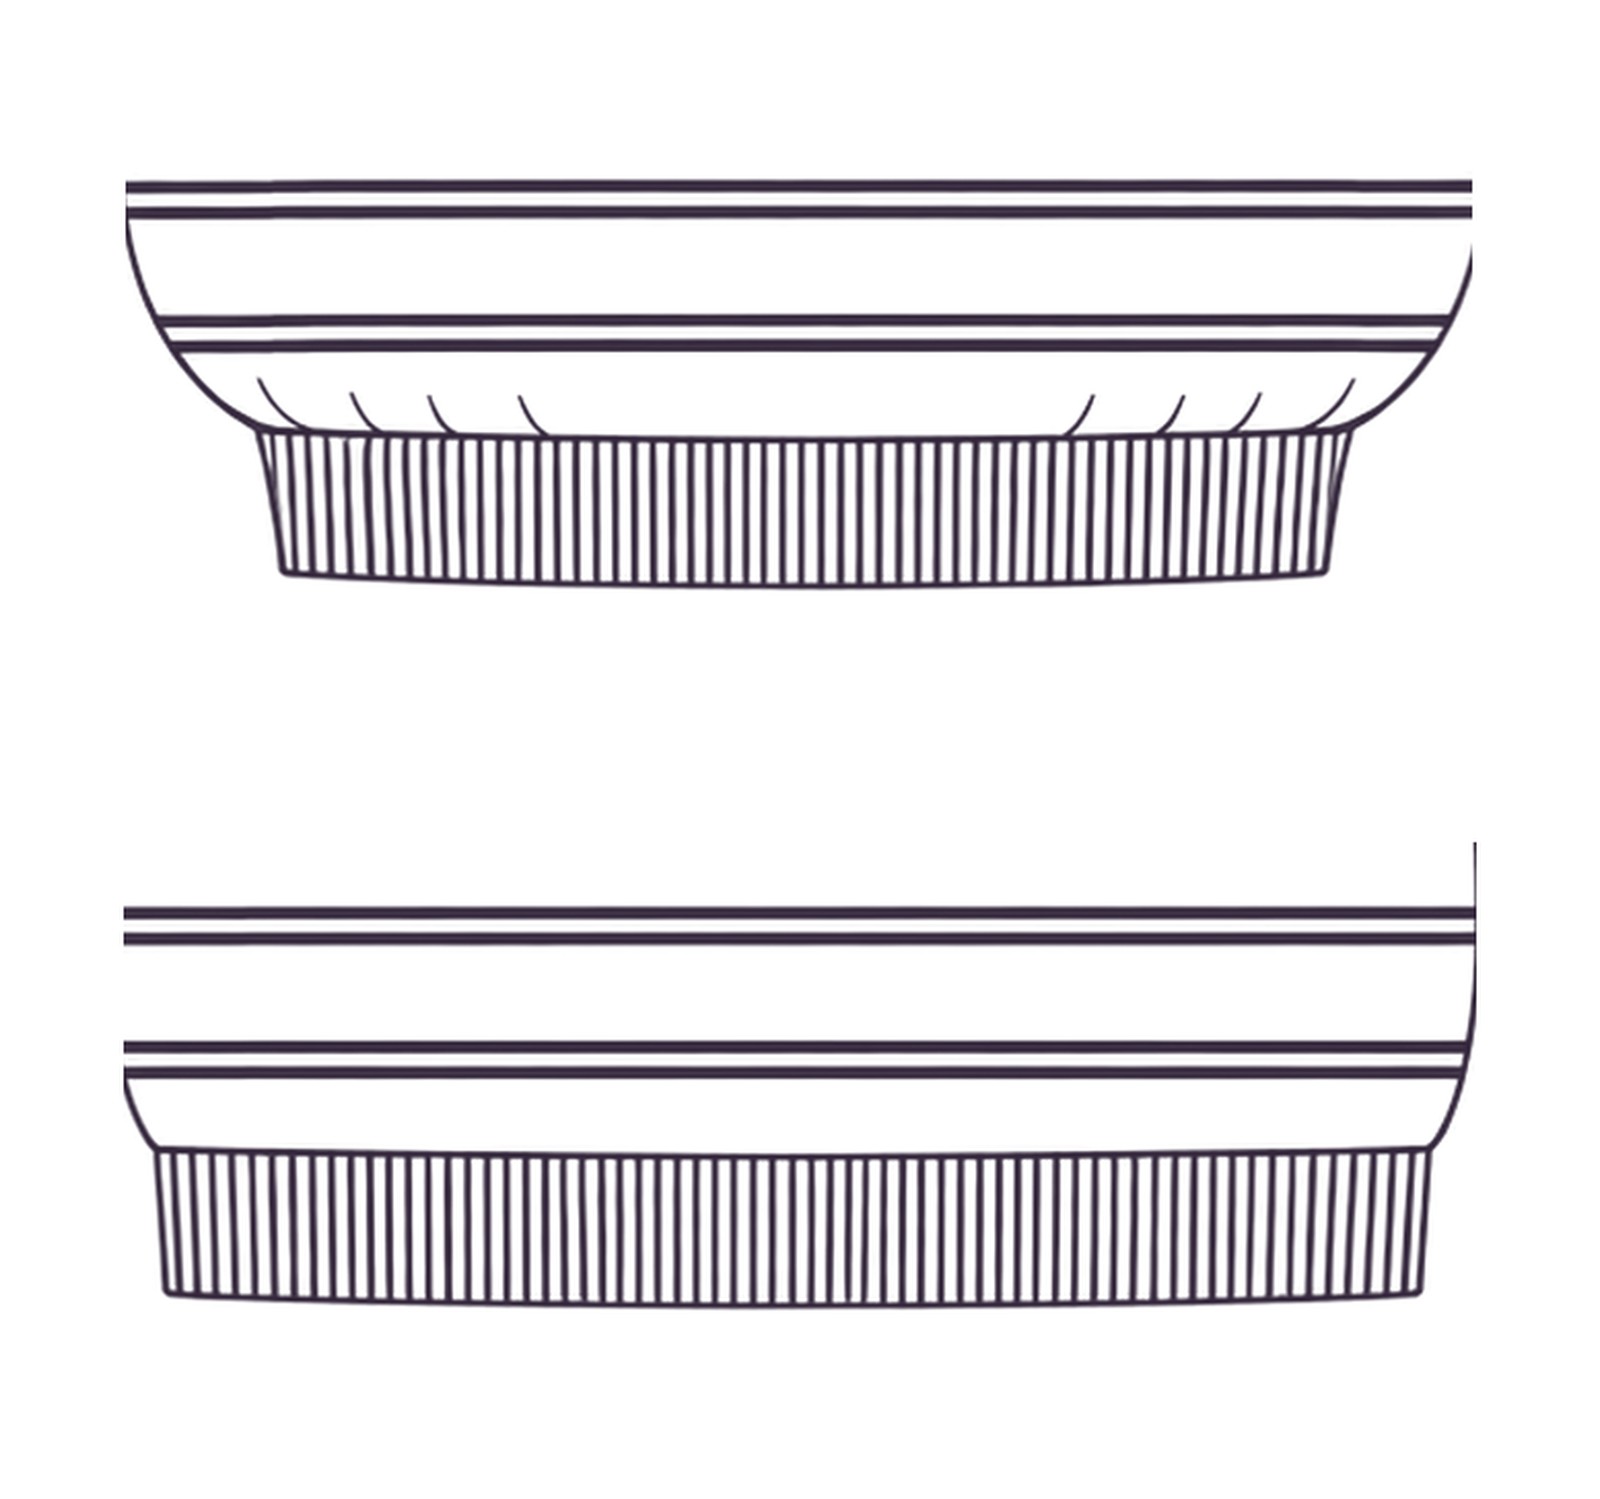
The relaxed finish keeps that light decrease round: the body falls almost straight into its ribbing. The gathered finish removes a quarter of the stitches just before the ribbing, by knitting two stitches together every four stitches. The hem draws in clearly, and the body blouses slightly above it, as in the schematic.
Either way, the ribbing is knitted in the contrast colour, like the cuffs. It frames the stripes and underlines the silhouette.
The test also helped fine-tune the length: the body was shortened by 6 cm in every size after a fitting. And just like for the sleeves, the pattern tells you how many centimetres to knit before the ribbing to reach exactly the length you want.
A discreet neckline
All that’s left is the neckline. The stitches are picked up on the smaller needles, in the main colour, for just 4 rows of 1x1 ribbing.
I wanted a fine, almost invisible edging that lets the line of the neckline do its work. The number of stitches to pick up was also recalculated during the test, as close to the edge as possible: one stitch in every cast-on stitch, and 3 stitches for every 4 rows along the sides. That way, the neckline sits just right.
A schematic redrawn during testing
The schematic itself evolved. One tester pointed out that it didn’t really show the finished sweater, and suggested drawing both versions side by side. I thought it was an excellent idea.
It now shows, on one side, the balloon sleeves with the gathered body, and on the other, the fitted sleeves with the relaxed body, with the cuffs at their true length. You’ll find it on pages 1 and 3 of the pattern.
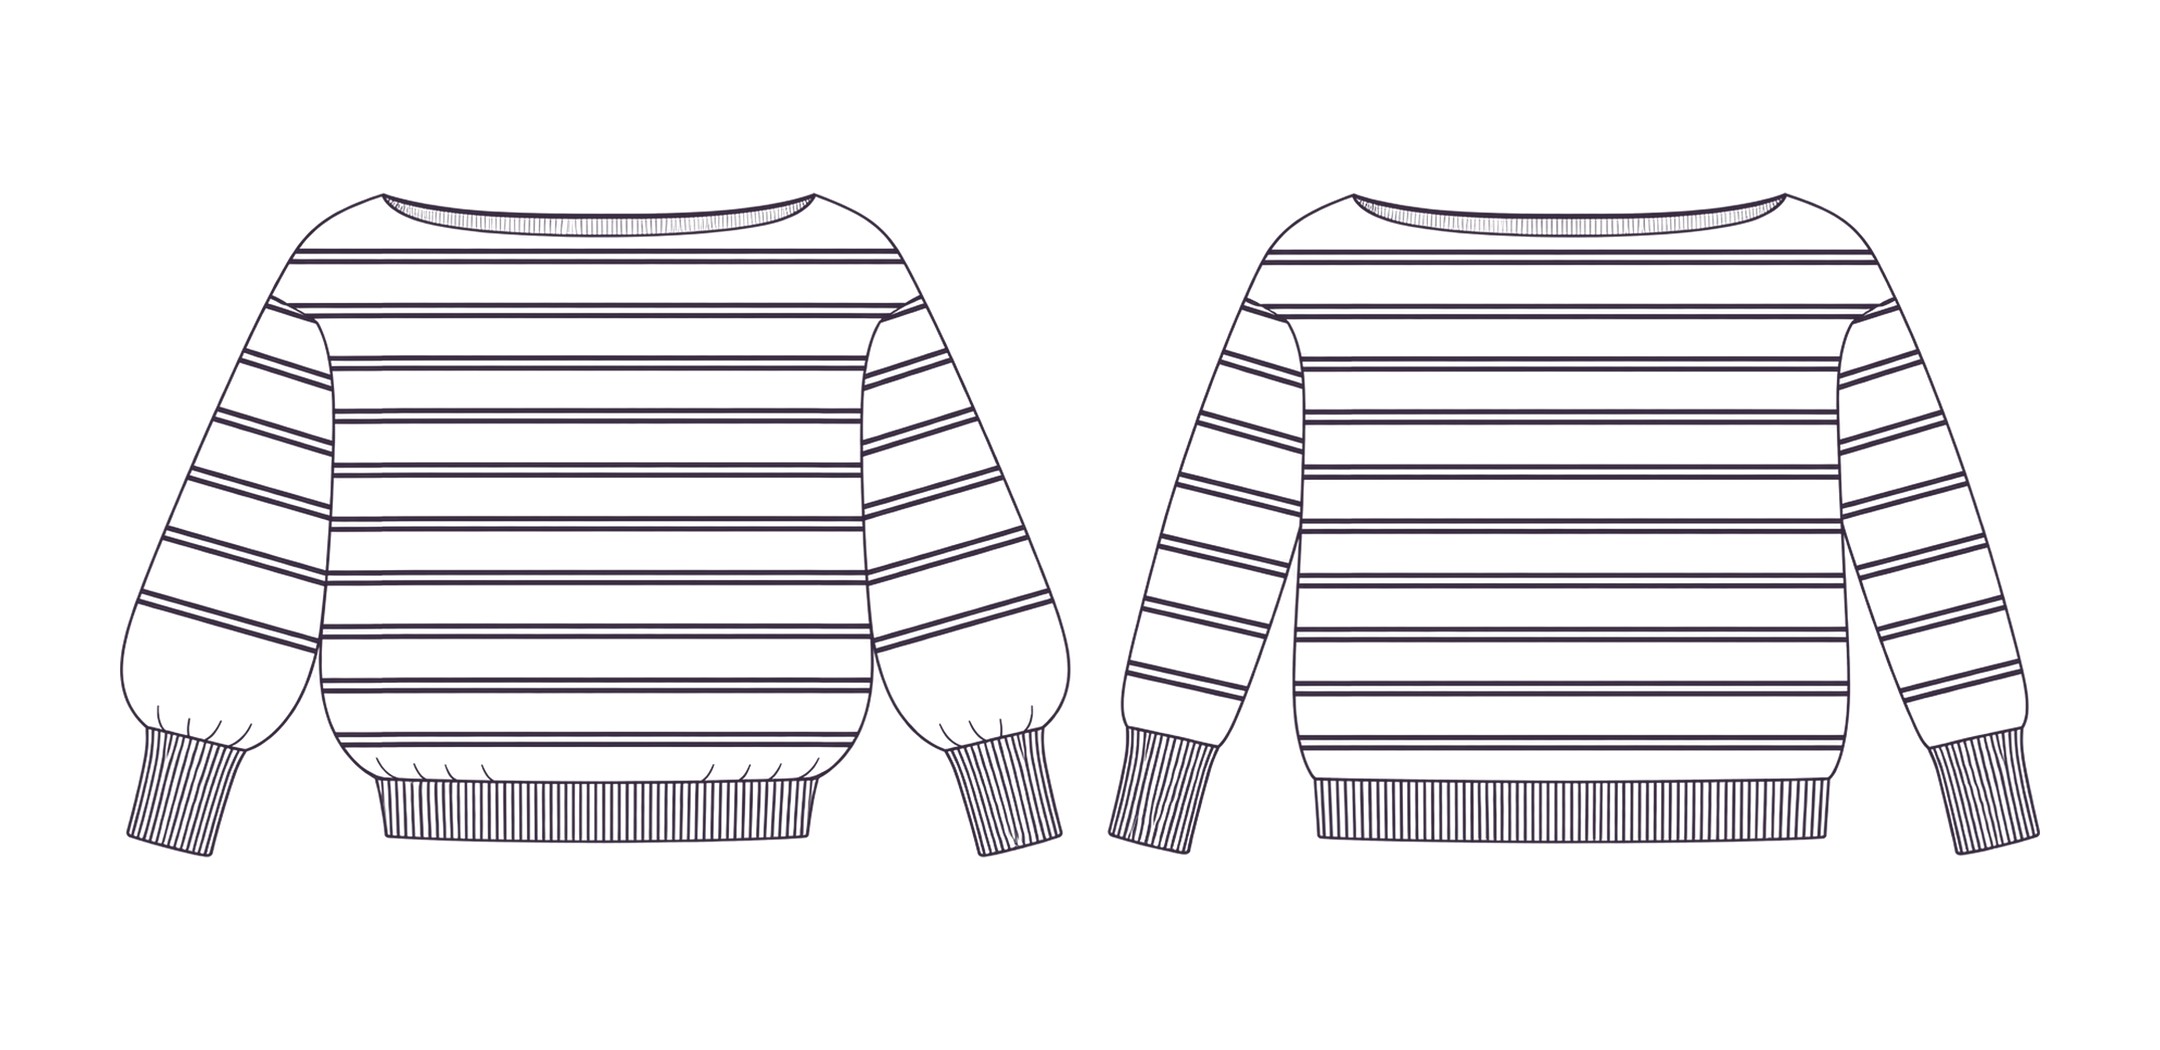
These are two suggestions, not two fixed designs. Balloon sleeves with a relaxed body, fitted sleeves with a gathered body: it’s up to you to choose the combination that suits you.
What testing brings
Looking back over this journey, I realise how much Collioure owes to its testers. A whole sleeve, a finish, the body length, the neckline, the schematic: every question, every fitting moved the design forward.
That’s the whole point of this stage, and it’s also why I wanted to tell you about it. Thank you to them for their keen eyes and their patience.
Sizes
Collioure comes in 16 sizes, for a finished bust circumference from 95 to 177 cm. I recommend 14 to 18 cm of positive ease.
The pattern runs to 8 pages. Everything is written out row by row, with no charts, and a measurements table on page 3 to help you choose your size.
Coming soon to your needles
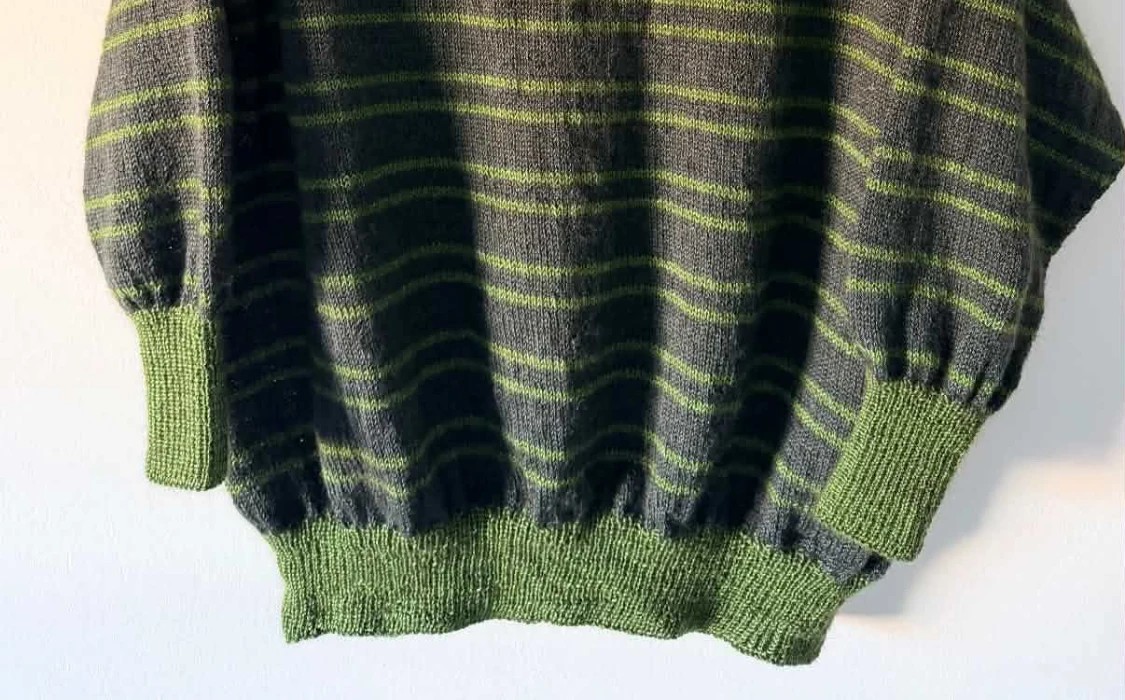
Collioure is quietly finishing its test. I’ll introduce it to you in full very soon, with its photos and its colours.
In the meantime, I can’t resist showing you a little piece of it.
And you? Tell me in the comments: balloon sleeves or fitted sleeves? Relaxed or gathered body?