Understanding knitting charts
The basics · 6 min
How do you read a cable symbol?
At first glance, the drawing may look complicated. Yet it already contains almost all the instructions you need. Break it down before reaching for your cable needle.
Symbol used in this tutorial
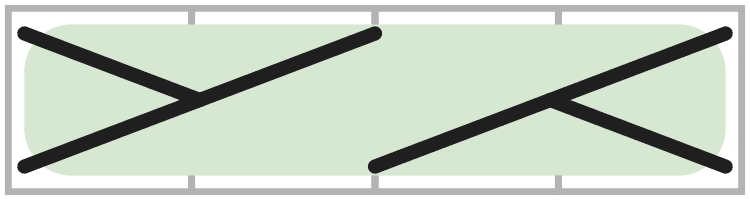
Break down the symbol
01 · Count
The width tells you the number of stitches
Each square in the chart represents one stitch. A symbol spanning four squares is therefore worked over four stitches.
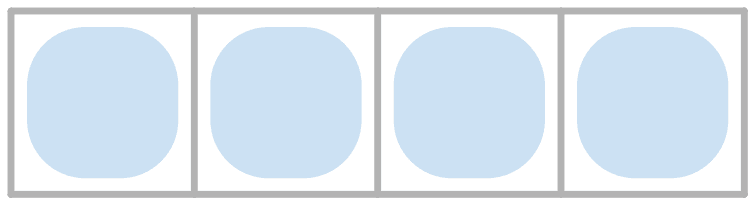
1 square = 1 stitch
02 · Divide
The squares also show the size of each group
Here, the stitches are divided into two groups of two. This is a 2-over-2 cable. Other symbols may divide the stitches as 1/2, 2/1 or 3/3.
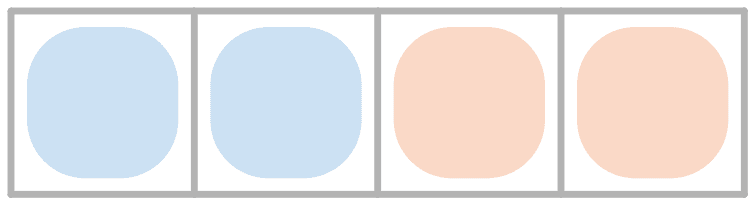
The crossing direction changes the result
For a right-crossing cable, hold the first stitches at the back of the work. For a left-crossing cable, hold them at the front.
To the right
stitches held in back
To the left
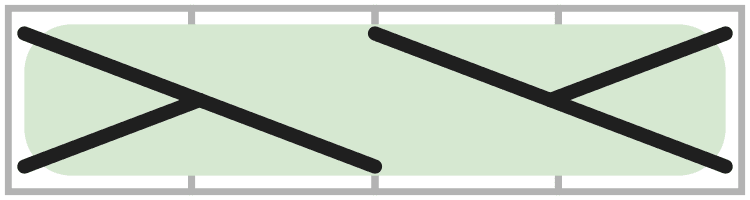
stitches held in front
The chart key remains the reference for checking the exact action.
Turn the symbol into stitches
Right-crossing cable
stitches held in back
- 01Slip 2 stitches to the cable needle and hold it at the back of the work.
- 02Knit the next 2 stitches.
- 03Knit the 2 stitches from the cable needle.
The group held in back appears underneath the crossing.
Left-crossing cable
stitches held in front
- 01Slip 2 stitches to the cable needle and hold it at the front of the work.
- 02Knit the next 2 stitches.
- 03Knit the 2 stitches from the cable needle.
The group held in front appears on top of the crossing.
Four things to look for
- 01
Count the squares in the symbol.
- 02
Divide the stitches into groups.
- 03
Identify the crossing direction.
- 04
Check the exact action in the key.
Next tutorial
How to read asymmetrical cables