Understanding knitting charts
Going further · 7 min
How do you read a chart with short rows?
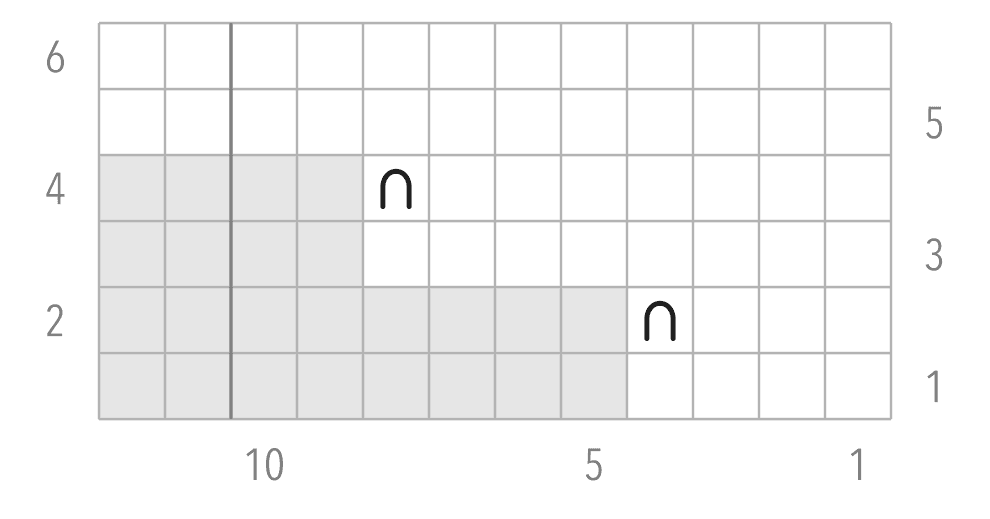
On a chart, short rows draw a staircase: some rows stop before the end. The grey squares and the double stitch symbol show where to turn and how to start again.
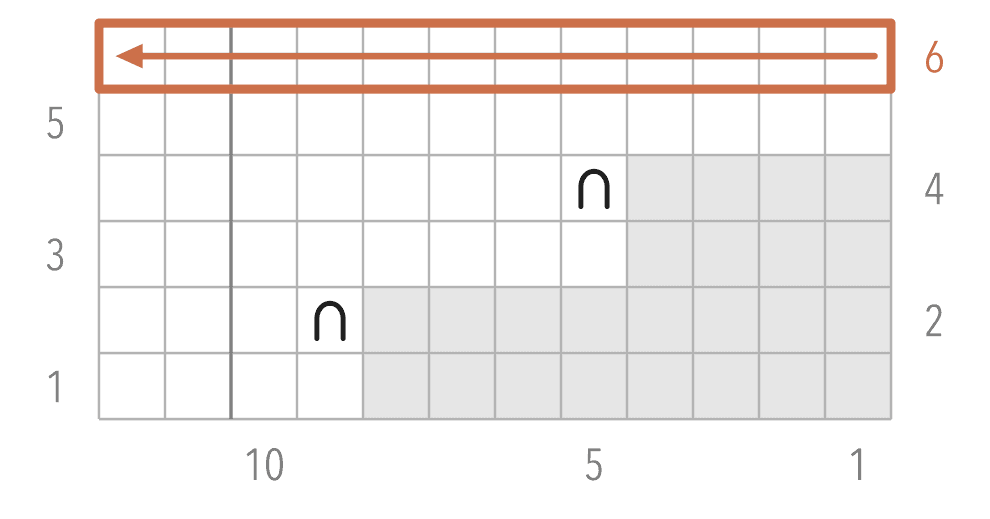
Chart used in this tutorial
A short row is a shorter row
A short row is not worked to the end: you turn the work before the end and head back the other way. On the chart, that row therefore has fewer white squares than the others.
The chart is read as usual: from the bottom up, right-side rows from right to left and wrong-side rows from left to right.
Grey squares: stitches that wait
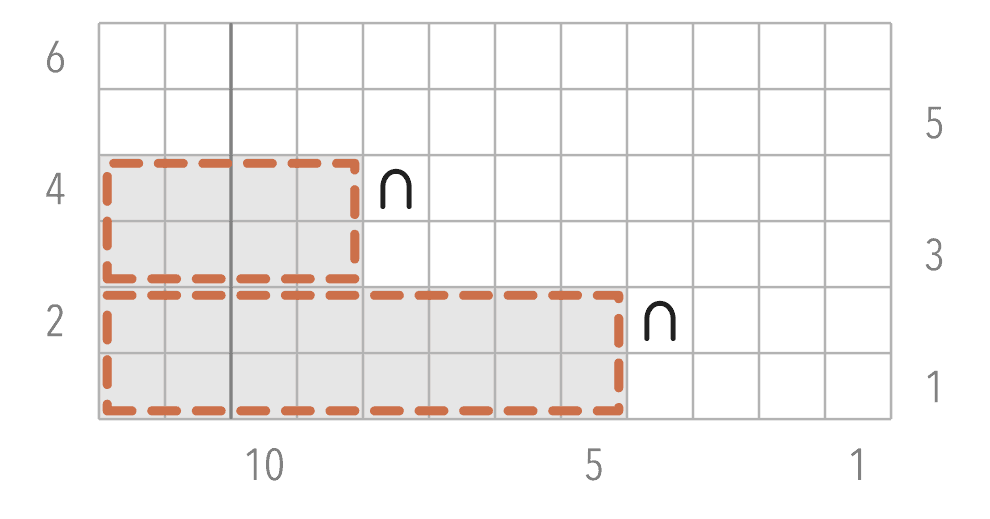
In the key, a grey square means “no stitch”. In short rows, read it as: no stitch to work in this row. These stitches do exist; they simply wait on the needle.
Stop at the last white square of the row, then turn the work. The waiting stitches are worked higher up, when the white line grows longer.
Do not bind off or slip these stitches: just leave them on the needle.
The ∩ symbol: the double stitch
The row that follows a turn begins with the double stitch symbol, written DS. It sits directly above the last stitch worked in the previous row: that is the very stitch you transform.
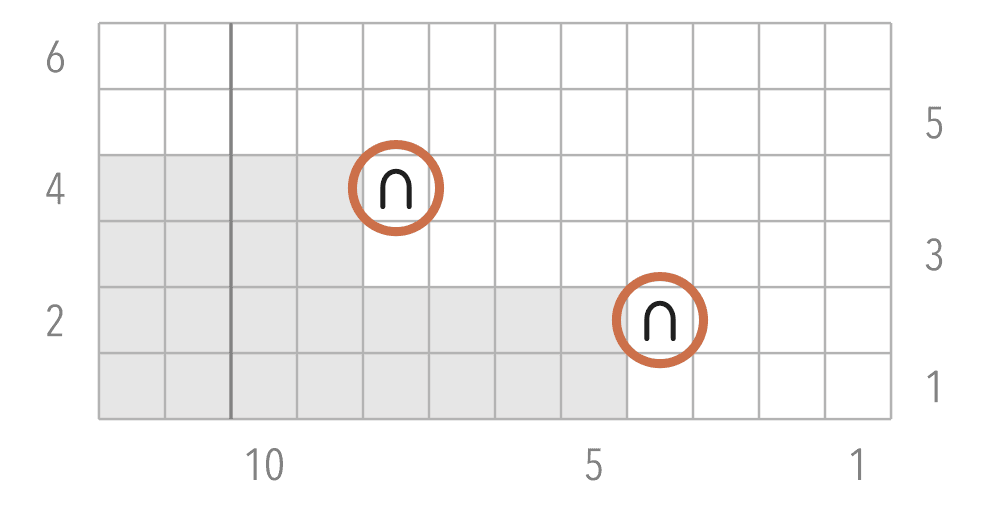
 right side: knit 1 · wrong side: purl 1
 double stitch (DS)
 no stitch
- 01Turn the work and bring the yarn to the front.
- 02Slip the first stitch purlwise.
- 03Pull the yarn up and over the needle: both legs of the stitch appear.
- 04Bring the yarn back into position for the next stitch, then carry on with the row.
The double stitch counts as one stitch.
Follow the chart row by row
The example has 12 stitches. Read each row in the direction of the arrow, over the white squares only.
Row 1 · right side
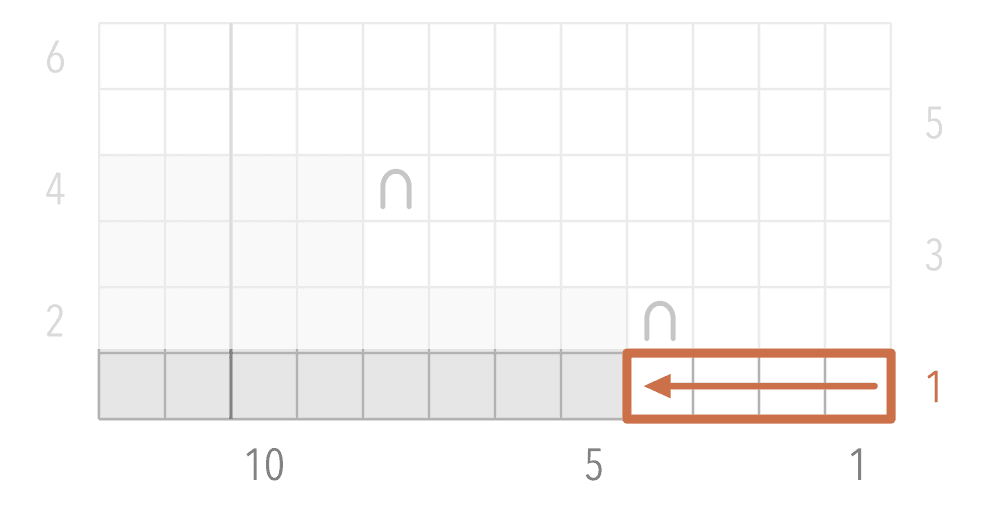
Knit 4, then turn. The 8 grey stitches wait.
Row 2 · wrong side
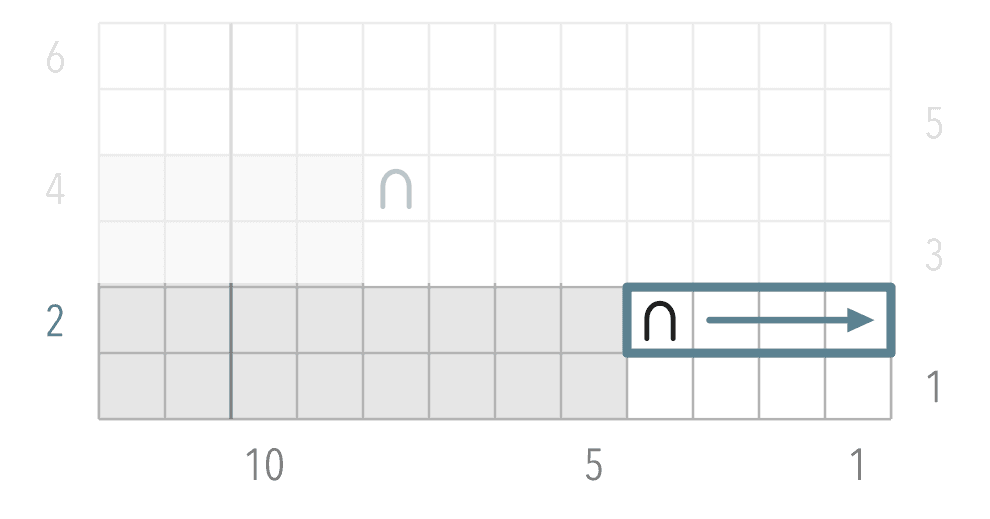
Double stitch, then purl 3 to the end of the row.
Row 3 · right side
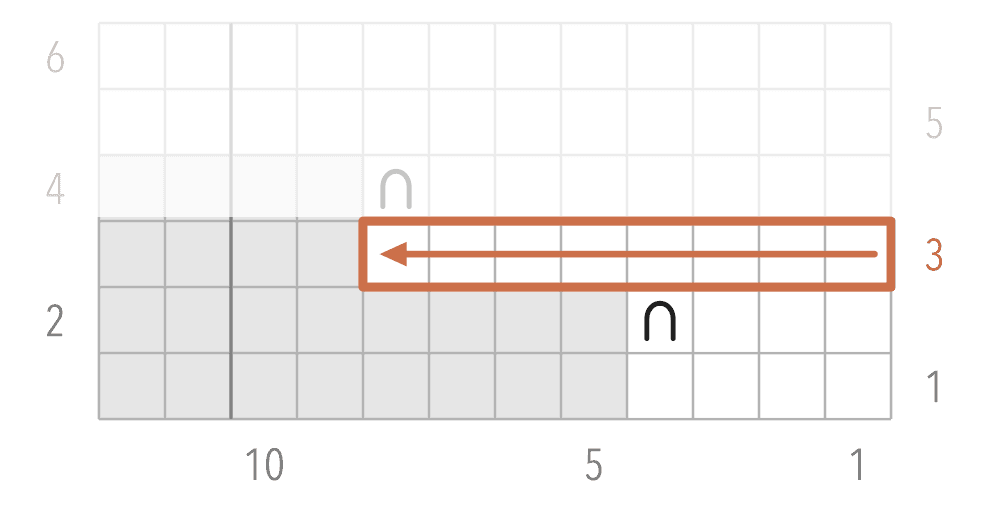
Knit 3, work the double stitch through both legs, knit 4, then turn.
Row 4 · wrong side
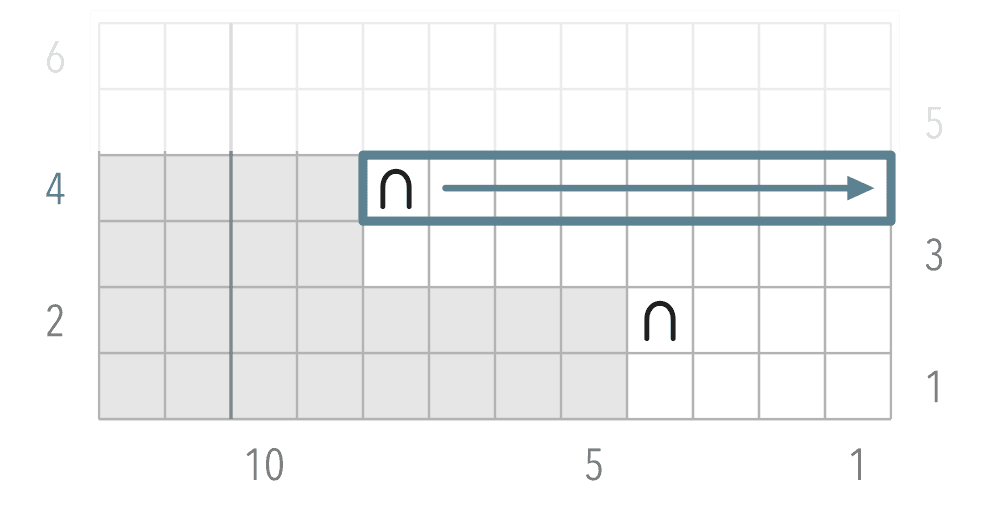
Double stitch, then purl 7 to the end of the row.
Row 5 · right side
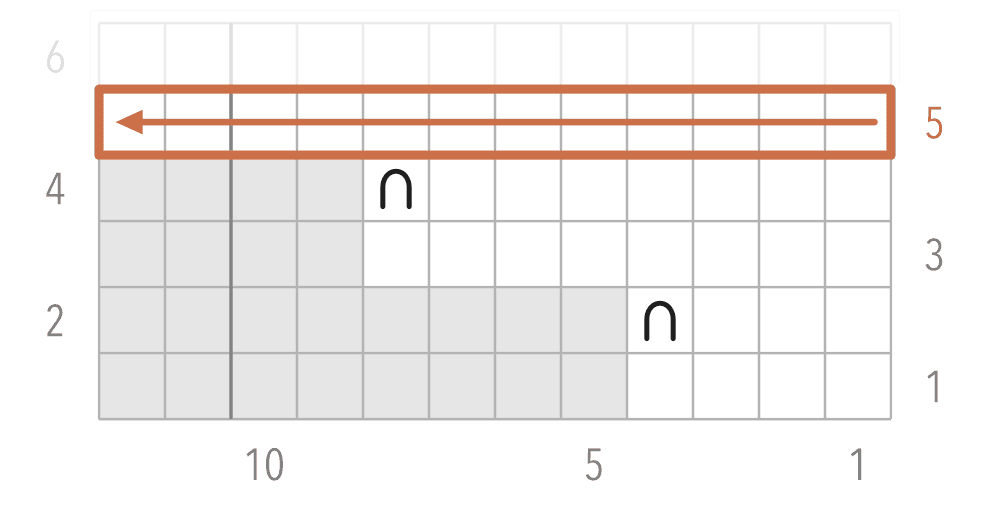
Knit 7, work the double stitch through both legs, knit 4. The row runs to the end.
Row 6 · wrong side
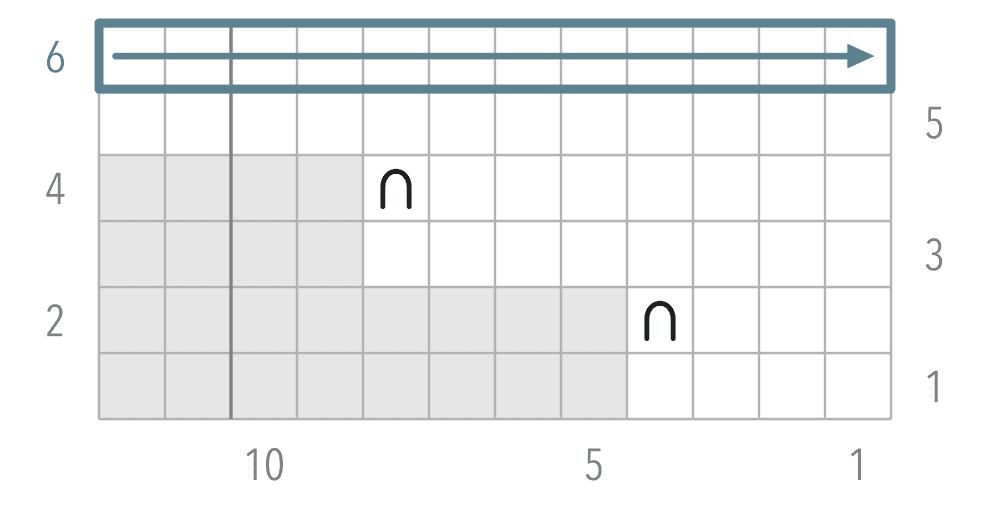
Purl 12. The short rows are complete.
Resolving the double stitch
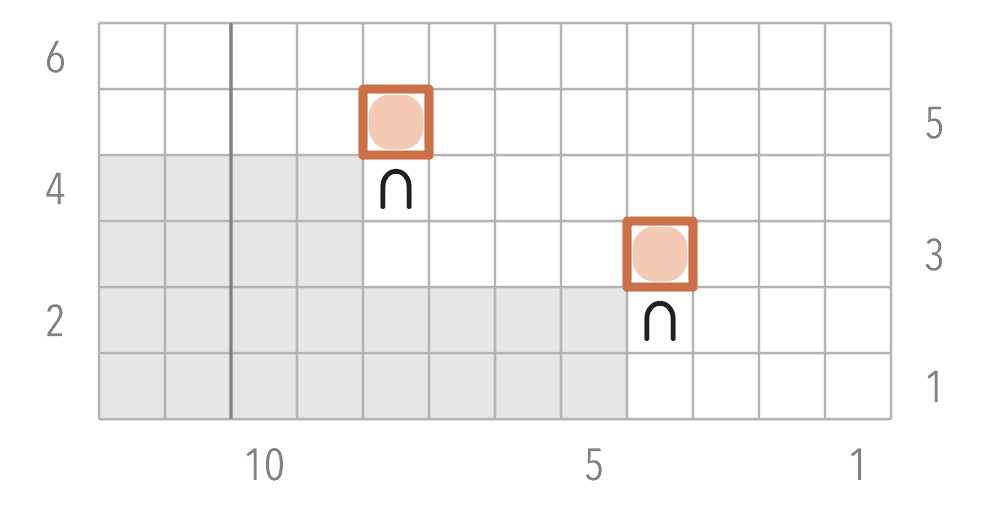
No symbol announces this step. When a row passes over a double stitch, the square is that of an ordinary stitch: work both legs together, knitwise or purlwise depending on the row, as a single stitch.
Two legs worked together = one stitch. The stitch count does not change.
When the first row is a wrong-side row
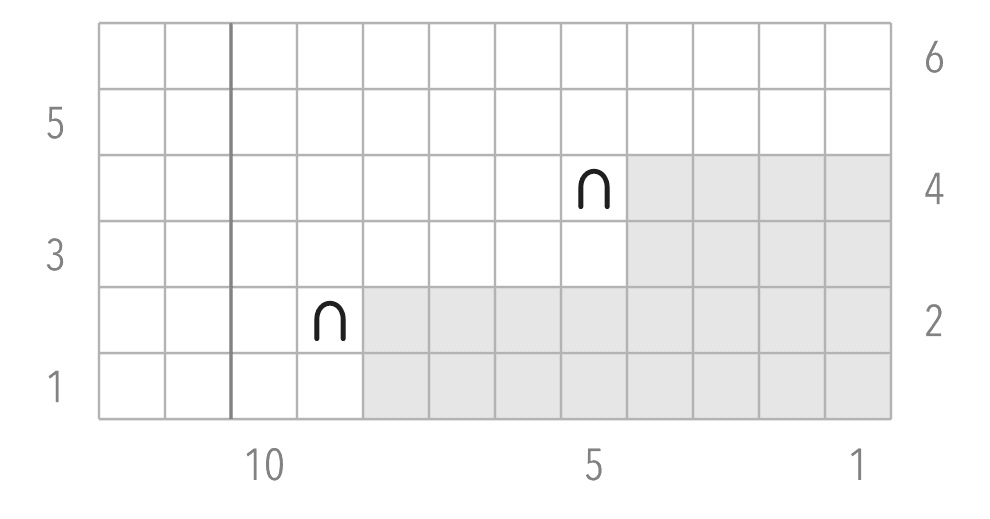
Some charts begin with a wrong-side row, for example on a mirrored piece such as a right front. Row 1 is then read from left to right, and the staircase sits on the other side.
The landmark does not change: the number sits on the side where the row begins. Here, the 1 is on the left.
Row 1 · wrong side
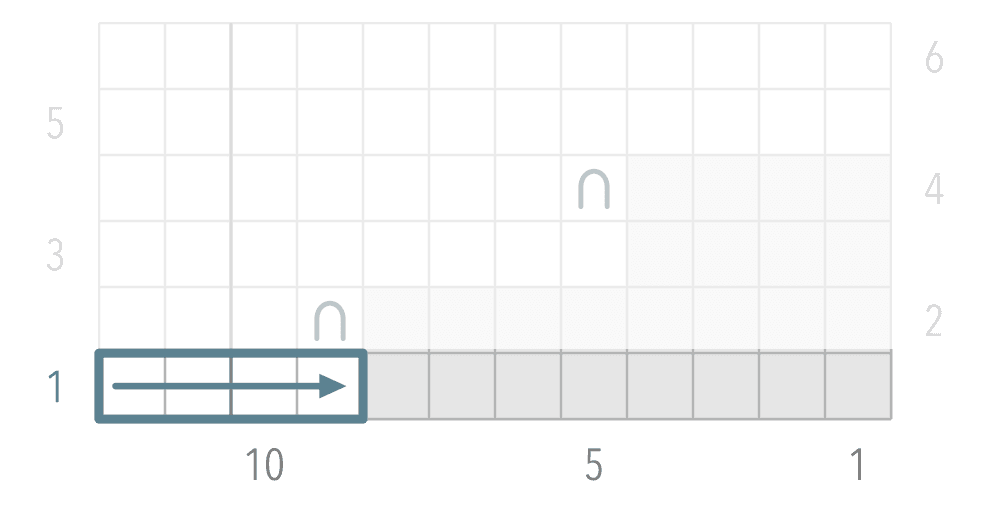
Purl 4, then turn. The 8 grey stitches wait.
Row 2 · right side
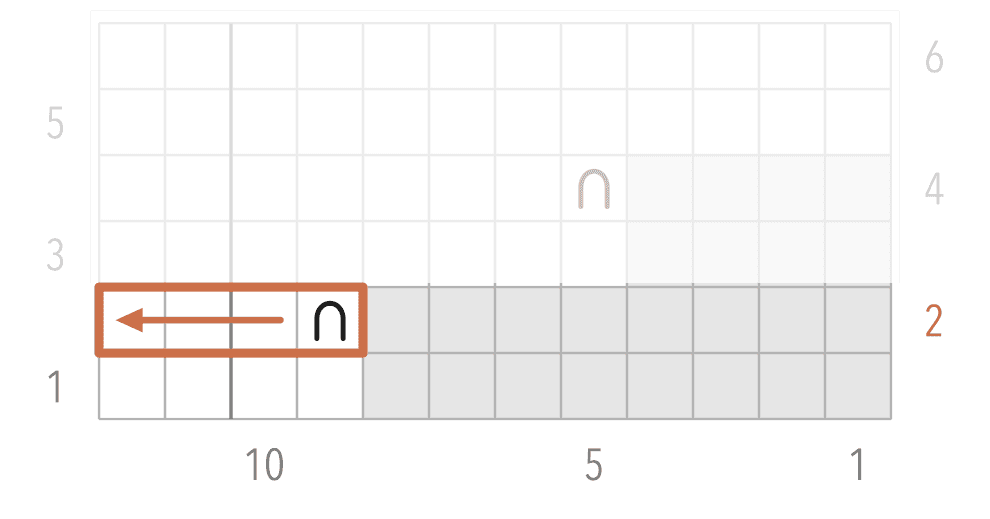
Double stitch, then knit 3 to the end of the row.
Row 3 · wrong side
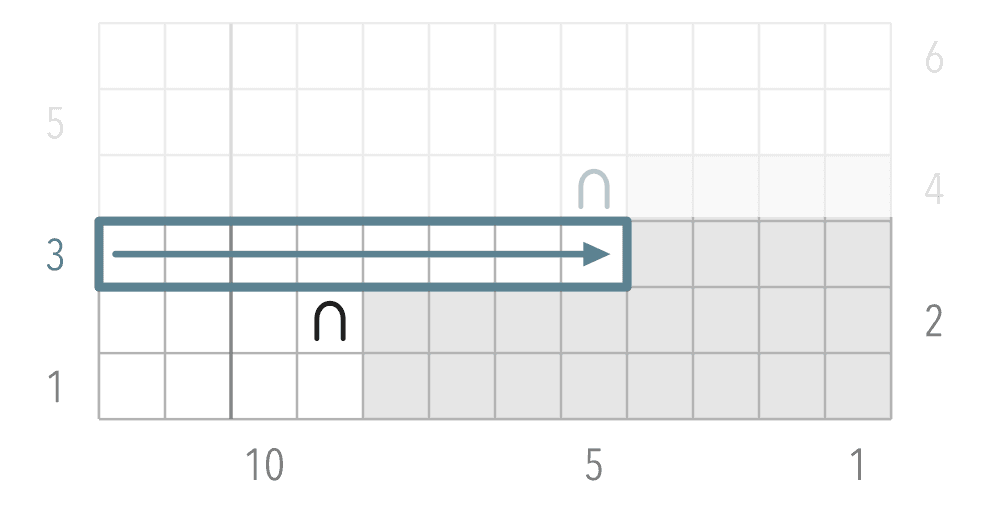
Purl 3, work the double stitch through both legs, purl 4, then turn.
Row 4 · right side
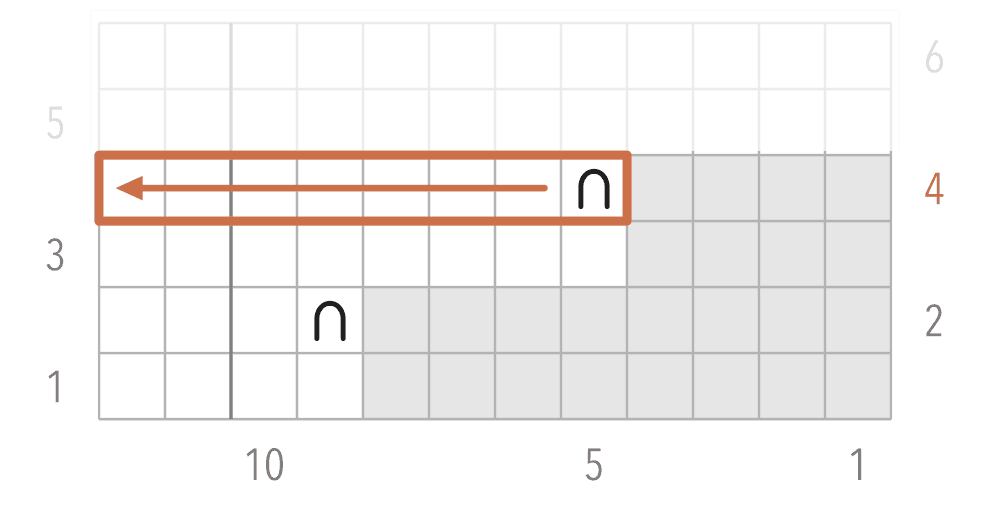
Double stitch, then knit 7 to the end of the row.
Row 5 · wrong side
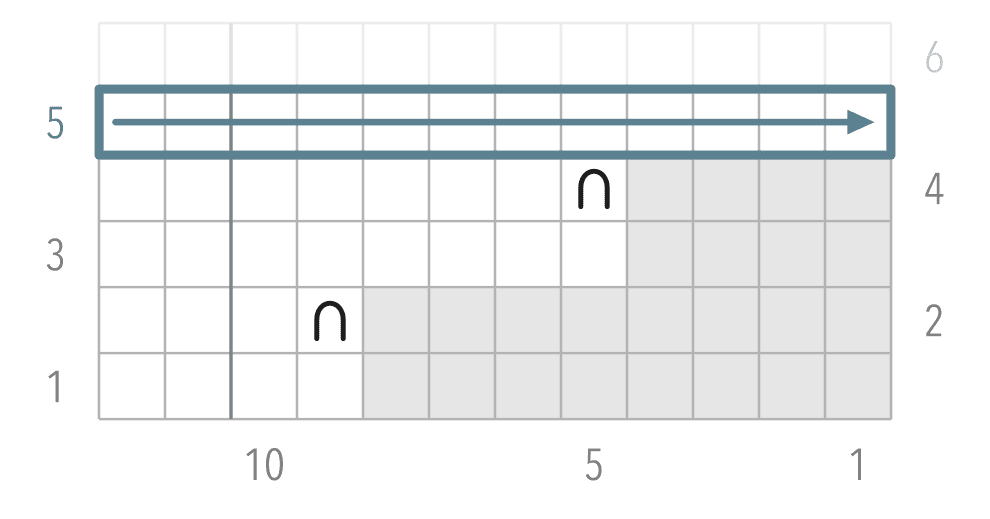
Purl 7, work the double stitch through both legs, purl 4. The row runs to the end.
Row 6 · right side
Knit 12. The short rows are complete.
Four things to look for
- 01
Read from the bottom up, following each row number.
- 02
Stop at the last white square, then turn.
- 03
Begin the next row with the double stitch.
- 04
Work the double stitch through both legs when you meet it again.
Next tutorial
How to choose your size